The Aadhaar Act of 2016 makes UIDAI the sole authority to disburse the unique 12 digit identification number in the form of an Aadhaar card. Aadhaar card serves as a proof of identity and can be used to avail the benefits of the schemes and initiatives launched by the Government of India. The process to enroll and get an Aadhaar card issues encompasses many stages. You will have to book an appointment at the enrolment center, provide the necessary documents, and then get a card issued.
Enrolment centers are the entities that are authorized to enroll the citizens for Aadhaar by collecting their biometric and demographic data in conformation with the UIDAI enrolment process. The centers are run by the enrolment agencies engaged with the registrars. The primary objective of the enrollment center is to facilitate a new applicant to enroll for the Aadhaar and provide assistance to the existing cardholders to update the details, whenever necessary.
How to locate enrolment center
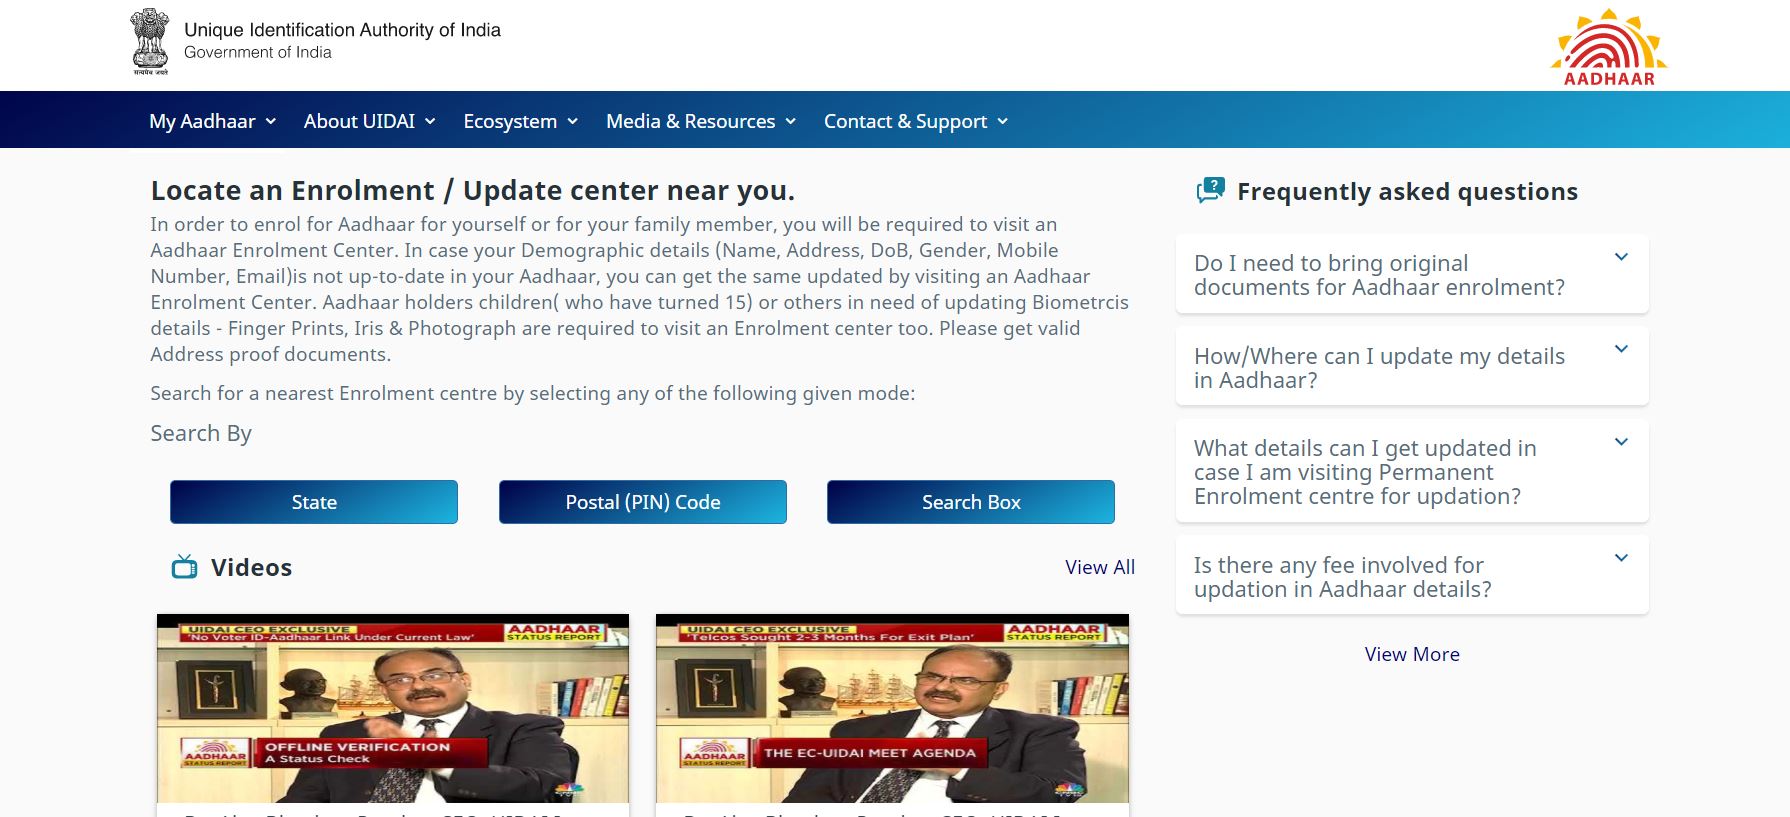
Applying for the Aadhaar card is easy. You can get started by looking for an enrollment center, and you can do this online. Just visit the UIDAI website and click on the ‘locate enrolment and update centers’. Select your state and enter the details, including pin code, district, village, town. You have an option to search for permanent centers only. Just check the box and enter the verification code. Click on search, and you will get all the details regarding the enrolment centers in your vicinity on your screen. Choose a more convenient one. You can visit the enrollment center to enroll for the Aadhaar or update the details of an existing one.

Locate an enrolment center on the UIDAI website
Tasks carried out at enrolment center
Aadhaar centers can facilitate the fresh enrolments of those people who were not able to do it so far. If a cardholder loses or misplaces the Aadhaar card, the enrolment center can help process the request for the duplicate of the same. You can also visit the enrolment center whenever you want to get any important detail updates. More importantly, the users have to visit the center to get their mobile numbers linked to the Aadhaar database. If your number is not registered, you won’t be able to use the online portal for a lot of other things.
Types of enrolment centers
Broadly categorized, there are two types of Aadhaar card enrolment centers. The permanent enrolment centers are operating on a full-time basis, to cater to the Aadhaar needs of the residents. These centers are operated by the authorized agencies. Temporary Aadhaar centers work on a contractual basis. Most of these centers aim for fresh enrolments. As the process is almost near saturation, most of the temporary Aadhaar centers have ceased their operations.
Booking an appointment
The most important step to get an Aadhaar card issued in your favor is to book an appointment in one of the enrollment centers. There are two ways to do this. The first one is to go directly to one of the enrollment centers and wait for your turn. You might encounter long queues and therefore a lot of inconveniences too. To overcome these problems, UIDAI has facilitated the process of online appointments. You can book an appointment slot as per your convenience, in an easily accessible enrolment center. All of this without the hassle of waiting for hours in never-ending queues. You can book an appointment at your nearest enrolment center for fresh Aadhaar enrolment, name update, mobile number update, address update, email id update, DOB update, gender update, or biometric update.
To book an appointment, visit the official website of UIDAI. Under the drop-down menu of ‘My Aadhaar’ tab, click on Book an Appointment option. You can select ‘book an appointment’ at UIDAI run Aadhaar Seva Kendra, and choose the city or location, which is convenient for you. Click on proceed to book an appointment. You can select the service you are interested in. The options available are – new Aadhaar, manage appointment, or Aadhaar update.
You can now click on new Aadhaar, following which, you will be asked to enter the mobile number. Click on generate OTP, and an OTP will be sent to the aforementioned mobile number. Click on Verify OTP. A separate page will ask for the details, including the state and city. You can also choose the Aadhaar Seva Kendra by selecting an option from its drop-down menu. Click on the “Next” button. Enter your full name, name proof, gender, date of birth, date of birth proof, email id, Pin, village/town/city, post office, district, address and address proof, and click on next.
The next page will display a calendar, and you can choose a date, followed by the time slot, and you will get an acknowledgment slip mentioning the appointment date, time, enrolment center details along with your details. Submit it and take a print out for your record. Make sure to visit the enrolment center at the set time and date to verify the documents you have just chosen while filing for an appointment.
List of documents required
To enroll for Aadhaar or to update any detail, UIDAI has made a list of acceptable documents, which can help you facilitate the process. The proof of identity documents which are deemed valid are – Passport, PAN card, photo ration card, driving license, government photo id, voter id, MNREGA job card, arms license, bank photo debit/credit card, CGHS/ECHS photo card, school/college id, kissan photocard, pensioner photo card, freedom fighter photo id, disability photo id with address card, certificate of photo id with address MP/PLA/gazette officer or village panchayat head on the letterhead. Many of the above documents can also be used for proof of address.
The proof of relationship documents that are deemed valid are – Passport, photo ration card, MNREGA job card, CGHS/ECHS photo card, pensioner photo card, and marriage certificate with the address. As for the proof of date of birth, you can furnish – Passport, PAN card, photo ration card, driving license, government photo id, certificate of birth issued by MP/PLA/gazette officer or tehsildar or village panchayat head on the letterhead.

