
There can be plenty of reasons why you would want to obtain a new SIM card. It could be because you’re on a brand new phone with a new plan or it could be because you’re switching your mobile carrier. Furthermore, sometimes replacing a broken SIM card can also call for the need for a new one.
Hence, in any of the aforementioned cases, you’ll likely need to activate your new SIM card properly, so that it can start working right away. Thus, to make your task a little bit easier, we have assembled some nifty suggestions that you can utilise to activate your AT&T prepaid sim card flawlessly.
For the uninitiated, AT&T is the largest telecommunication provider not only in the United States but also across the world. Headquartered at the Whitacre Tower, which is located in Downtown Dallas, Texas, AT&T currently brings in revenues of more than $181 billion per year and has a subscriber base of more than 100 million users.
Activate AT&T Prepaid SIM via Mobile /Computer
For activating your AT&T prepaid SIM directly via your mobile device (online), follow the below-mentioned steps:
- Before activating your AT&T prepaid SIM, ensure that your mobile device has enough charge. Proceed to insert the SIM card into the device and turn it on. You’ll receive an ATT text message containing a unique URL. Click on the URL and allow the webpage to load.
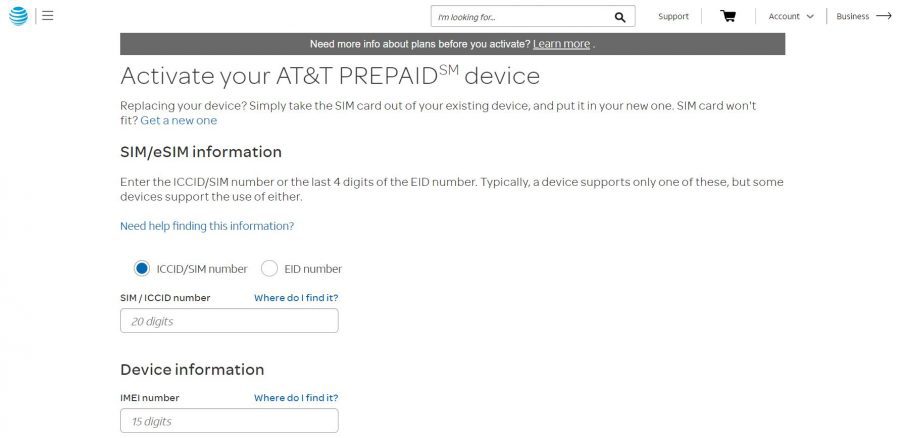
- On the webpage, you have to enter your ICCID or SIM number along with your mobile phone IMEI number. Moreover, you also need to add your location zip code (which is a maximum of five digits) along with the Captcha code. Once done, proceed to the next step.
- Based on your preferences, you have to select whether you want to activate one or more devices. Once you’ve done that, don’t forget to select your desired monthly plan (along with the option to select ‘Autopay’). Finally, accept the AT&T Service Agreement and head over to the subsequent step.
- The website will now ask for your email ID and once you’ve provided the same, you have to enter your payment information. You’ll have the option to choose between your debit/credit card or an AT&T Prepaid Refill card for the payment. Soon after, you’ll be provided with a plan summary along with your mobile number. You’ll then have to restart your phone, to complete the process.
- Once you’ve restarted your phone, you’ll receive a ‘welcome’ message containing a new web link from AT&T. Click on the link and you’ll be greeted with a web page asking you to set up a new password along with a 4-digit PIN. Additionally, you also have to provide your personal information, such as your name and address.
- Henceforth, you’ll receive a verification code in your email. Enter the code and you’ll get access to your AT&T account. Proceed to review your account summary page for your plan details and if you want to make any alterations (such as enabling ‘Autopay’ ON or OFF), you can now do so.
Alternatively, if you’re reluctant to use your mobile phone for the online activation of your AT&T prepaid SIM, you can also visit the official AT&T activation website from your computer, and follow the on-screen prompts.
Activate AT&T Prepaid SIM Over the Phone
To activate your AT&T prepaid SIM over the phone, feel free to call the customer care helpline at 877-426-0525. You will be greeted with automated instructions to assist in your SIM activation process.
Remember to keep your mobile phone IMEI and SIM card number handy because they’ll be crucial in completing the procedure. The activation process will take a maximum of around ten minutes to be completed.
Activate SIM at AT&T Official Store
In case you want to activate your prepaid SIM through an AT&T official store, you have to first locate the nearest AT&T store around you by using the online store locator.
Once you’ve found your preferred location, be sure to visit the same with your mobile phone, prepaid SIM card and identity documents for verification. Your prepaid SIM will be activated on spot and you can start using your mobile device without any delay.