There’s no denying that customs clearance for any country is a long-winded process. Passengers not only have to declare their imported goods properly but also pay duty on items that are beyond the exempted limits. However, CBIC, or the Central Board of Indirect Taxes and Customs in India, makes it effortless for incoming travelers to fast-track the entire paperwork, ultimately leading to higher user satisfaction.
Originally formed in 1964, the CBIC is tasked with the responsibility of implementing indirect taxes and customs duties in India. Its primary motive has always been to provide transparent and efficient services to trade and taxpayers, pushing India towards being a trade-friendly country. The organization also plays a key role in the facilitation of trade and commerce for India with the rest of the world, along with the detection and prevention of smuggling and other tax evasion activities.
So, if you are traveling to India, you are required to pass through the Indian customs authorities at the airport. And by doing so, you have to declare any imported goods that you may have possessed during your overseas trip. That is why we have created an easy-to-follow guide that can assist you in completing the clearance process efficiently.
Steps For Paying Custom Clearance Fee
According to the Central Board of Indirect Taxes and Customs in India, every passenger landing in India has to pass through the customs check process once he/she is cleared by the immigration officer and has taken delivery of his/her baggage from the conveyor belts. There are two channels that the passenger can decide to pass through, namely – the Green Channel and the Red Channel. The “Green Channel” is for passengers who do not possess any prohibited or dutiable goods. On the other hand, the “Red Channel” is for passengers possessing prohibited or dutiable goods.
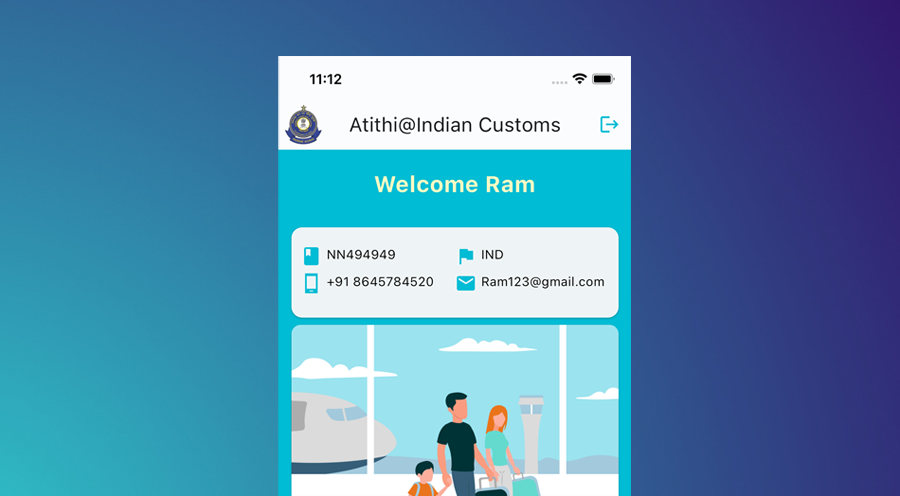
Passengers passing through the “Red Channel” are required to fill out a customs declaration form, where correct information must be provided for the goods that they are carrying. Additionally, the declaration process can also be completed beforehand (even before boarding the flight to India) by using the “ATITHI” mobile app. To start the declaration process right away, follow the suggested steps below closely.

- Begin your journey by first downloading the ATITHI app, either from the Google Play Store or the Apple App Store.
- Once downloaded, launch the app and proceed to sign up using your mobile number and email address. Additionally, you have to provide your nationality, passport number, and your name and address (as mentioned in your passport).
- After completing the sign-up process, log in to your account and select the “Make Declaration” option.
- In the next step, you need to declare the goods that you are planning to import into India. Ensure that the information is correct (to the best of your knowledge).
- Once done, submit the declaration, and you will receive confirmation messages on your registered email ID and phone number.
- When you arrive in India, proceed to state your declaration reference number so that the customs authorities can verify your goods with the declaration that you have submitted.
- Finally, you will be required to pay for your customs duties via electronic methods such as bank transfer or your debit/credit card on the spot.
- Once you have successfully paid the customs duties, you will complete the clearance process.
Documents Required and Other Related Information

As per the rules and regulations laid down by the CBIC, the only document that you need to furnish when making the customs declaration is your passport (or equivalent travel document). Your passport number must be mentioned to complete the clearance process.
Talking about duty-free allowances and entitlements on arrival – which ultimately decide the amount of customs fee that you have to pay to the authorities – involves multiple terms and conditions. A quick summary has been provided below.
When Arriving From Nepal, Myanmar, and Bhutan: Whether you are an Indian resident, a foreigner residing in India, or a tourist, you will be allowed to carry personal effects, travel souvenirs, and articles up to a maximum value of 15,000 INR. The aforementioned goods must be carried either by the passenger or inside his/her accompanying baggage. Exceeding the aforementioned total value will be subject to customs duties.
When Arriving From Countries Other than Nepal, Myanmar, and Bhutan: If you are a tourist, then you will be allowed to bring used personal effects, travel souvenirs, and articles up to a maximum value of 15,000 INR – either with you or in your accompanying baggage. However, if you are an Indian resident or a foreigner residing in India, then you will be allowed to bring used personal effects, travel souvenirs, and articles up to a maximum value of 50,000 INR – either with you or in your accompanying baggage. Exceeding the total value mentioned above will be subject to customs duties.
Additionally, Indian residents and foreigners residing in India are not allowed to bring firearms; cigarettes exceeding 100 sticks, cigars exceeding 25 or tobacco exceeding 125 grams; alcoholic liquor or wines exceeding 2 liters; gold or silver in any form other than ornaments; and flat-panel televisions (plasma, LED, or LCD).
Lastly, declarations of foreign currencies must also be made in the following cases: when the total value of foreign currency exceeds $5,000 or an equivalent amount; and when the aggregate value of foreign exchange (including currencies) exceeds $10,000 or an equivalent amount. Also, keep in mind that trafficking in narcotics and psychotropic substances is a punishable offense in India with imprisonment.
How Much Time Does the Clearance Take?
Whether you decide to complete the customs declaration process online via the ATITHI app or offline after arriving in India, you can expect the clearance process to be completed within a couple of minutes.
For any additional queries or assistance, you can get in touch with the CBIC authorities via email at icegatehelpdesk@icegate.gov.in.

