The presence of Dell in the UAE is a part of its global expansion and vision to provide accessible and customizable technological solutions to the masses. It was during the late 1990s and the early 2000s, when the company’s interest in setting up shops in the Middle East coincided with the rise of the internet and the increasing demand for personal computers and IT infrastructure in the region. And given Dell’s strength in enterprise solutions, its initial efforts were aided by the government institutions and businesses in the UAE.
As internet penetration and consumer demand for computing solutions grew in the country, Dell started broadening its retail presence through collaborations and partnerships with major electronic retailers. The company also adapted its product offerings and marketing strategies to cater to the specific needs and preferences of the UAE market, including language support and localization. Additionally, maintaining a competitive pricing strategy while offering value to the customers via after-sales support has also proved the company’s commitment towards the country’s developing technological landscape.
If you are a proud owner of a Dell computing device in the UAE, whether it is a desktop or a laptop, and have the urge to know about your product’s current warranty status, then our in-depth guide can be of help.
What are the Steps to Check Warranty Status
Similar to its rest of the world operations, Dell UAE uses its ‘Service Tag’ number, abbreviated as ‘ST’ or ‘S/N’, to identify its products and validate their warranties. The service tag number consists of an alpha-numeric combination of numbers and alphabetical letters, is usually found printed on a sticker, at the side or bottom interface of most Dell laptops and desktops.
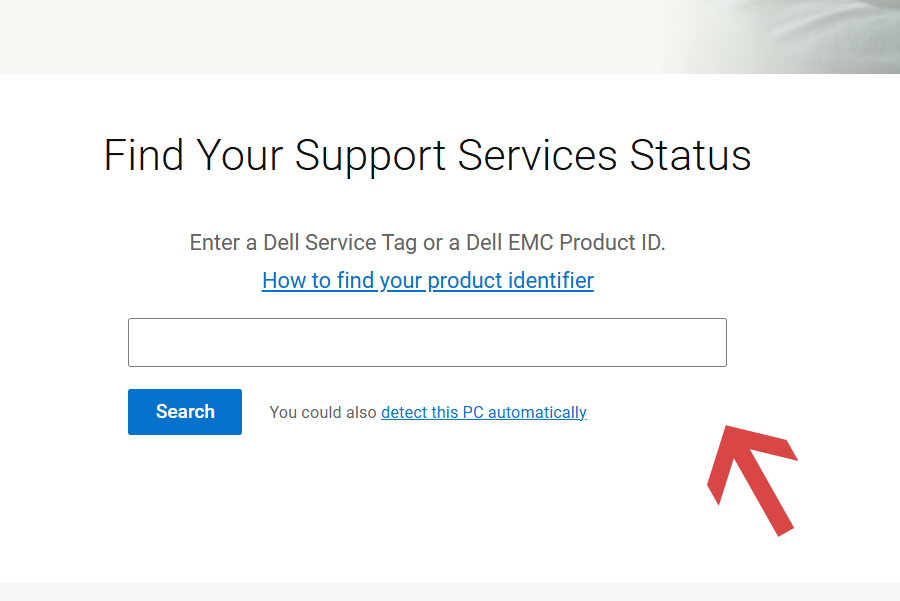
You will need to have your device’s service tag number before you can check its warranty, and once you do that, follow the below-mentioned steps to complete the process.

- Begin your journey by first visiting the official website.
- On the destination page, you will need to enter your device’s service tag number or serial number.
- Once done, hit on ‘Search’.
- The current warranty status of your device will be showcased on your screen, including any remaining warranty period.
How to Find Your Serial Number
Contrary to popular beliefs, there are a multitude of ways through which you can find the serial number for your Dell laptop or desktop. While finding the service tag label printed on your product might be the easiest way to access it, there are a host of other ways as well, that you can effectively explore.
Based on your level of expertise, you can follow any of the below-mentioned processes (and its associated steps) to find out your device’s serial number.
Finding Serial Number Using Dell SupportAssist App

- If you are using a Dell computing device that is running on the Microsoft Windows operating system, you need to first download the ‘SupportAssist’ app.
- Once downloaded, run the setup file and install the software on your computer.
- After successful installation, launch the app, and you will find your device’s serial number or service tag located at the top-right corner of the window.
Finding Serial Number Using Windows Command Prompt
- In addition to downloading the Dell SupportAssist app, you can also use the command prompt function on your Microsoft Windows-based system. Start by first clicking on ‘Start’ from the home screen and search for the ‘Command Prompt’ or ‘CMD’ program option.
- Once you find it, click on it and a black-colored window will pop-up on your screen.
- To get your device’s serial number or service tag number, type in the following command: wmic bios get serialnumber and hit ‘Enter’. On doing so, you will be able to discover your device’s serial number.
Please note that if you are running the Linux operating system on your Dell device, then you need to follow the below-mentioned steps instead:
- Start by first opening up Linux terminal using the following shortcut: CTRL + ALT + T.
- After that, type in the following command to get your device’s service tag: sudo dmidecode -s system-serial-number, and hit ‘Enter’. Remember to log in as a superuser or administrator before you perform this step.
- The serial number will be shown on your screen.
Finding Serial Number Using the BIOS Interface
- Proceed to the first boot-up or restart of your Dell laptop or desktop.
- When the ‘Dell’ logo appears for the first time, continue pressing the ‘F2’ key on your keyboard multiple times, so that you can access the BIOS interface.
- Once you are in the BIOS, you will be able to find your device’s service tag or serial number under the ‘System Information’ or ‘Overview’ section.
How to Get Official Support
In any scenario, if you require further assistance, you can get in touch with the Dell UAE customer support department via phone at 8000 441 3889 or +442030243099 (Toll).
Phone lines are available from Sunday to Thursday between 9 AM and 5:30 PM and between 9 AM and 1 PM on Fridays (local time).

