
Being a global technology powerhouse, Lenovo’s entry in the Indonesian market did not materialize until the early 2010s. The company’s entrance was marked by a strategic focus on understanding the needs of the country’s consumers and ultimately tailoring its product line to suit the audience.
Lenovo’s core offerings in Indonesia included desktops, laptops, and workstations, which later overflowed into mobile computing tools such as mobile phones and tablets. Such a diverse portfolio allowed the organization to cater to various customer segments – from students and home users to small businesses and large-scale enterprises. Lenovo also spent a fortune building a strong network of distributors, retailers, and service centers so that after-sales could easily be taken care of. In addition to that, the company’s focus on affordability allowed it to recognize the price sensitivity of the Indonesian market, leading to competitive pricing and making computing hardware available to a broader audience.
With that being said, if you currently own a Lenovo computing device in Indonesia, be it a laptop, desktop, or tablet, and you want to find out its warranty status, then our all-inclusive guide can help you find the ideal process to gain your objective.
Steps to Check Warranty Status
Before you begin the process of tracking down the warranty status for your Lenovo device, you need to first know its serial number. Usually, serial numbers for Lenovo products come printed on a label, that is attached to the back or bottom side of the device. Often denoted by the ‘S/N’ or ‘SN’ prefix, the device’s serial number can also be recovered from the product box, user manual, or the product purchase invoice.
Once you obtain the necessary serial number for your Lenovo laptop, desktop, or tablet, you can follow the suggested steps below to know its present warranty status.
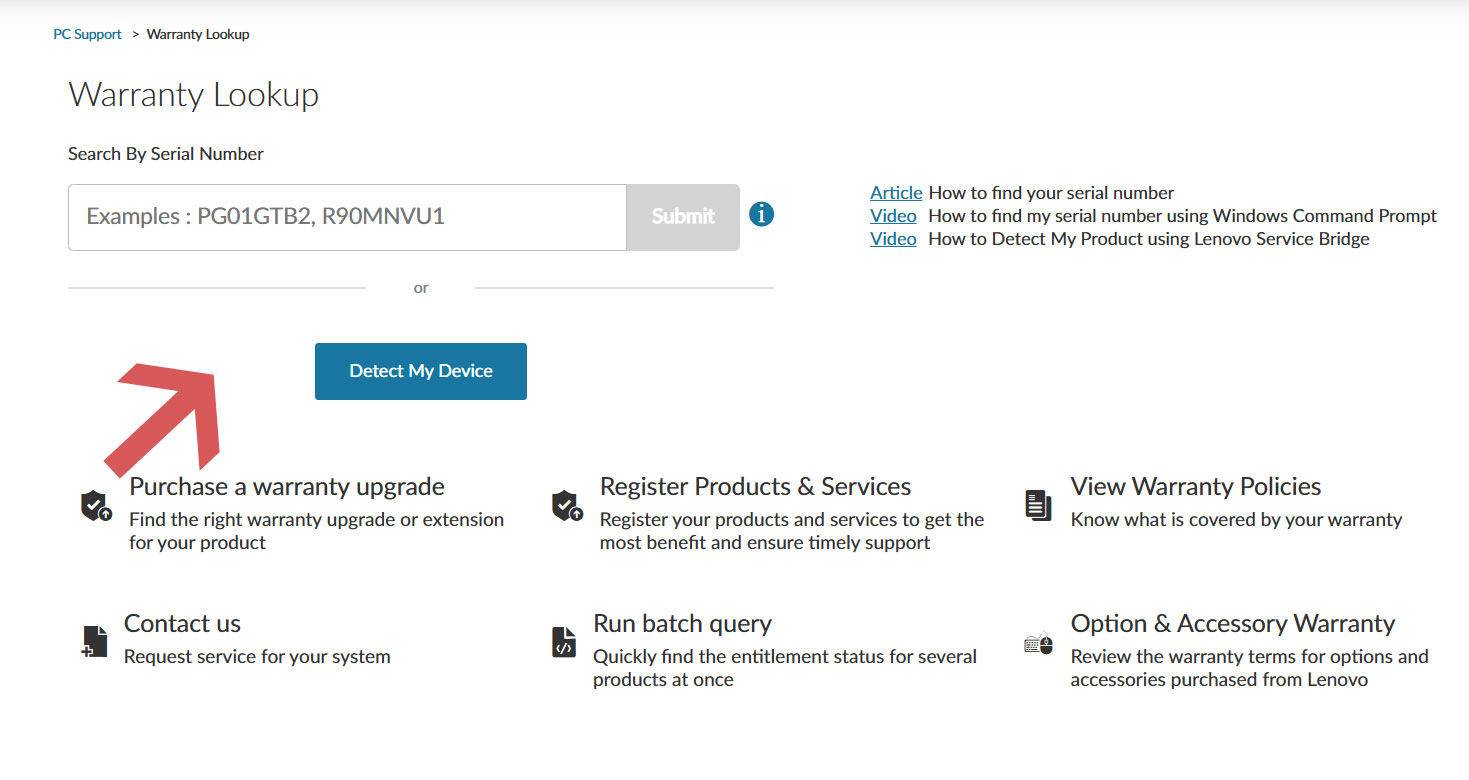
- Begin your journey by first visiting the official support web page for Lenovo Indonesia.
- On the destination page, you will be provided with an empty box where you will need to enter your device’s serial number.
- After you have successfully entered the serial number, click on ‘Submit’.
- The website will then fetch your device’s warranty status and will instantly show the same on your screen.
How to Find Your Serial Number
Lenovo Indonesia allows plenty of different ways to find the serial number for your computing device, apart from consulting purchase invoices, product boxes, or printed labels. From running software commands to installing programs specifically to recover your device’s serial number, be sure to follow any of the below-mentioned processes to save your precious time and efforts.
Finding Serial Number Using Lenovo Service Bridge (LSB)
- Start by first downloading the Lenovo Service Bridge program. Ensure that your laptop or desktop is running Microsoft Windows 10 operating system or a later version before proceeding to install the software.
- Once downloaded, run the setup file and install the program on your system.
- After successful installation, proceed to launch LSB and the program will automatically detect your system’s model and serial number, and will eventually show the same on your screen.
Finding Serial Number Using Lenovo Vantage App
- The primary step involves visiting the official Lenovo Vantage website. Be sure that you device is running Microsoft Windows 10 or later operating system.
- Proceed to download the app’s setup file and then run it. The program will ask for installation approval, and upon doing so, the software will be successfully installed.
- After that, launch the Lenovo Vantage app, and the program will automatically obtain your system’s model number and serial information. You can then use the serial number obtained from the app to check your device’s warranty status.
Finding Serial Number Using Windows Command Prompt
- Begin by first booting up your Lenovo device running the Microsoft Windows operating system, pressing the ‘Windows logo key + X’ simultaneously, and then selecting Windows Powershell/Windows Powershell (Admin)/Command Prompt (Admin). Alternatively, you can search for ‘Command Prompt’ or ‘CMD’ from your device’s home screen.
- Upon selecting, a small black window will pop up on your screen, and in that window, type the following command: wmic bios get serialnumber, and then hit ‘Enter’.
- Your device’s serial number will be shown directly on your screen without any delay.
Other Ways to Find Serial Number For Your Lenovo Device
Keep in mind that if you are using a Lenovo Chromebook running Google’s Chrome operating system, then you need to press the ‘ALT + V’ keys simultaneously at the sign-in screen to get your device’s serial number.
Conversely, for Linux users, you need to type in the following command in a shell prompt or terminal: sudo dmidecode -t system | grep Serial, and hit ‘Enter’ to be able to view your product’s serial number.
Lastly, if you are using a Lenovo tablet running Google’s Android operating system, then you need to head over to your phone’s ‘Settings > About Tablet > Serial Number’ to obtain what you need.
How to Get Official Support
In any scenario, if you require additional assistance from Lenovo Indonesia’s customer care department, you can simply reach out to them over the phone at +6221 5085 1755 (PSTN) or 007 803 3315 108 (toll-free).
Alternatively, you can also submit an e-ticket online by filling out the requisite web form. Remember to include correct information wherever possible for a swift resolution.